How To Start a WordPress Blog in 2022: The Definitive Guide


Web Hosting Sumo is supported by our readers. When you purchase via links on our site we may earn a commission. The price you pay isn't affected by this commission. We only promote products that we truly believe in. Learn more.
Are you wondering how to start a blog?
Do you want to start a blog, but have no idea how?
This guide has everything you need to know about Starting A Blog.
I will guide you through every step of the process.
So, if you are ready to start your very OWN blog, let’s dive in:
3 Reasons Why You Should Start A Blog Today
There are a lot of reasons why you will want to start a blog.
Here are a few to motivate you:
1. You Can Make Money Blogging
Here’s the deal:
Making money blogging is not easy. It takes a lot of time and hard work.
BUT that doesn’t mean it’s not possible.
You can start making a passive income from your blog once you reach a decent amount of subscribers.
How many readers you need to start generating a passive income from your blog will depend on your niche.
But in general, the more subscribers (or monthly readers) you have, the more money you will make.
There are a lot of bloggers who generate a full-time income from their blogs.
2. Establish Yourself As An Authority
When you consistently write about a topic online, people in your industry start to consider you an expert.
This expert status can bring you freelance work, job opportunities, and speaking gigs, and can help you get in touch with other industry experts.
3. Blogging Can Help You Grow Your Business
If you sell a product or service, blogging can help you grow your business exponentially. It will bring more attention to your offerings.
The best part?
It doesn’t cost much and has an insanely high ROI.
The 4 Steps To Start A Blog
Here are the 4 steps you need to follow in order to start a blog:
- Decide What You Want To Blog About
- Choose a Blogging Platform
- Choose a Web Host
- Install WordPress
The following sections will cover each step in detail.
Step 1: Decide What You Want To Blog About
If you want to earn money with your blog, you will want to decide on a topic to blog about and stick to it.
When choosing a topic to blog about, here are a few things to keep in mind:
Blog about something that you like or are passionate about.
Sometimes, it can get really difficult to motivate yourself to write about something you don’t even care about.
It’s totally possible to be successful writing about something you aren’t passionate about.
But when you blog about something you are actually passionate about, you will enjoy the following benefits:
- Almost never running out of ideas for blog posts.
- Being able to persevere when you don’t see any results.
- Less likely to face burnout.
- Being motivated to write more.
You don’t have to be an expert
You do not have to be an expert on the topic to start a blog.
While expertise in the subject you wish to write about helps a lot, it’s not a requirement.
Most of the successful bloggers I know started blogging when they were beginners.
Step 2: Choose a Blogging Platform
Now it’s time to choose a blogging platform.
A Blogging Platform is a service you use to create a blog.
There are a lot of free blogging platforms available on the internet.
Blogger.com by Google, WordPress.com, and Tumblr are good examples of free blogging platforms.
It can be tempting to start your blog on a free platform.
But remember, all free blogging platforms come with a lot of limitations.
It is always a bad idea to start your blog on a free platform.
Here are a few reasons why you should NOT create your blog on a free platform:
- You don’t own the platform – Free platforms can suspend or even delete your blog anytime they want without any prior notice.
- Your blog will have a really long URL – Most free platforms don’t allow using your own domain name. A website URL like your-site.freebloghost.com is really long and hard to remember.
The Bottom Line?
It is never a good idea to start your blog on a platform you don’t own or control.
Instead, host your blog on your own.
This guide covers all the steps required to start a self-hosted blog.
When creating a self-hosted blog, you will have to choose a Content Management System.
It is basically a piece of software that helps you manage the content on your website.
Even though there are hundreds of content management systems available, I use and recommend WordPress.
It’s completely free, powers more than 25% of websites on the internet, and owns a market share of 58.9%:
It is the easiest and the most flexible Content Management System available.
While you are free to choose any blogging platform you like, this guide will only cover starting a self-hosted WordPress Blog.
To set up a self-hosted WordPress blog, you need two things:
A Domain Name
A domain name is simply the address of a website.
It is what your users will type in their browsers to visit your website.
For example, Google.com is the domain name of Google.
It’s the address people type in their web browsers to visit Google.
At this point, you don’t need to have a domain name or even buy one.
I will guide you through the process of registering (buying) a domain name in the next step.
Web Hosting
Web Hosting is the home of your website and all its content.
You can’t start a website without web hosting.
In the next step, I will guide you through getting Web Hosting and a Domain Name for your website.
Step 3: Choose a Web Host
A website is simply a collection of web pages.
And a web host provides you with server space to post these web pages on the internet and make them available to the public.
Basically, a web host provides you tools and resources required to make a website available on the internet.
There are a lot of web hosts available on the internet.
But Here’s the deal:
Most Web Hosts aren’t reliable.
You need a web host that is fast and secure.
For that reason, I recommend using Site Ground.
Site Ground has been in business since 2004 and is trusted by thousands of bloggers.
Follow the below steps to sign up for Site Ground:
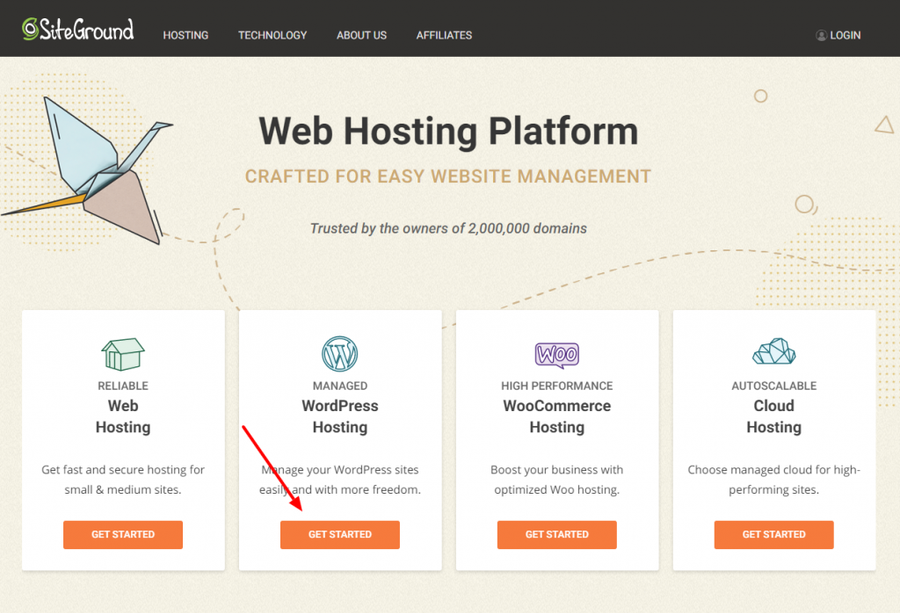
1. Visit Site Ground
… and click the Get Started button under WordPress Hosting:
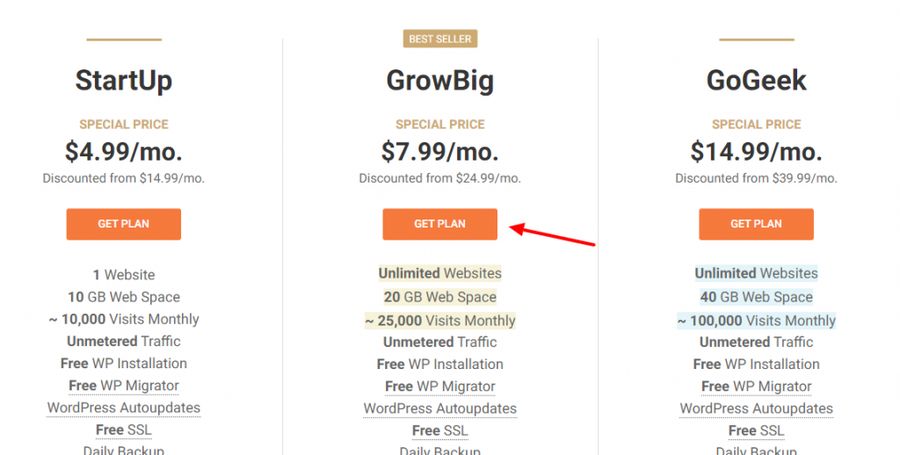
2. Select A Plan
Select a plan that best suits your needs.
The StartUp plan only allows you to host one website.
If you are planning to host multiple websites on the same account, choose the GrowBig plan.
If you are a beginner, I recommend choosing the GrowBig plan. It comes with enough power to handle a growing website:
3. Choose A Domain Name
Now it’s time to choose a domain name for your website.
As mentioned earlier, it is the address your visitors will type in their web browsers to visit your website.
If you don’t have a domain name, here are a few tips to help you choose one:
- Short and Easy To Remember – Choose a name that is both short and easy to remember. For Example, wpobsessed.com, Google.com, WordPress.org, etc.
- Avoid Hyphens – Avoid using more than one hyphen. The more hyphens you use, the more difficult it will become to remember your domain name.
- Try Something New – Don’t be afraid to try something other than .com. Even Google’s parent company, Alphabet, uses the abc.xyz domain name.
- Be creative – If your preferred domain name is not available, don’t be afraid to get a little creative and try something like GrooveHQ.com or BufferApp.com.
Once you have decided on a domain name, enter the domain name and click proceed:
Is your perfect domain name not available?
Try another domain extension, use your name, or be creative and use a unique name like QuickSprout or WPObsessed.
Now, try not to be a perfectionist.
Just choose a domain name that is suitable for your blog. And move on to the next step.
Once, you have found the best suitable domain name for your blog, enter it in the input field, and move on to the next step by clicking the Proceed button:
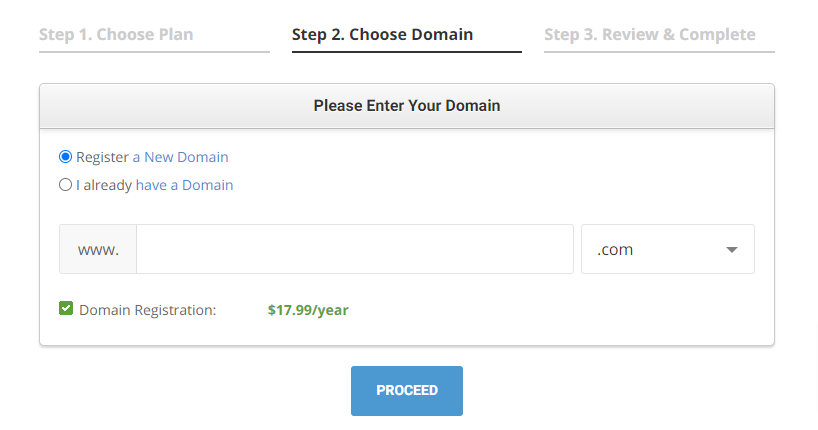
Already Have A Domain Name?
If you already have a domain name, check the “I already have a domain” check box, enter your domain name and click the big blue Proceed button.
4. Enter Your Account Information
Now, it’s time for you to enter your account and billing information:
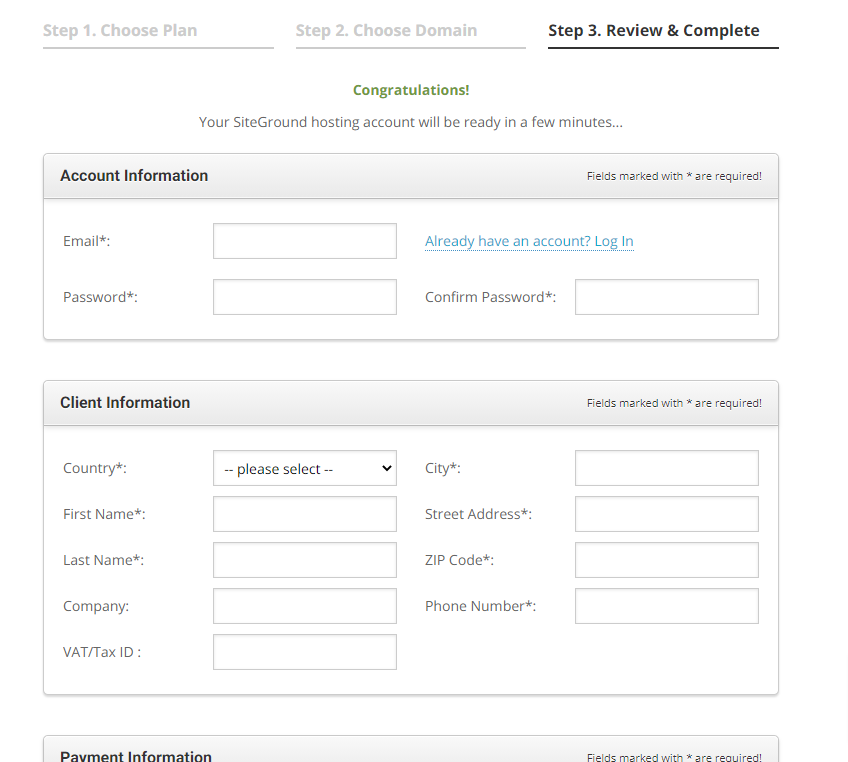
Double-check your email address before you use it.
You will receive your login information on the email address you enter.
Once you have entered all required information, scroll down to the bottom of the page and uncheck all the Extra Services:
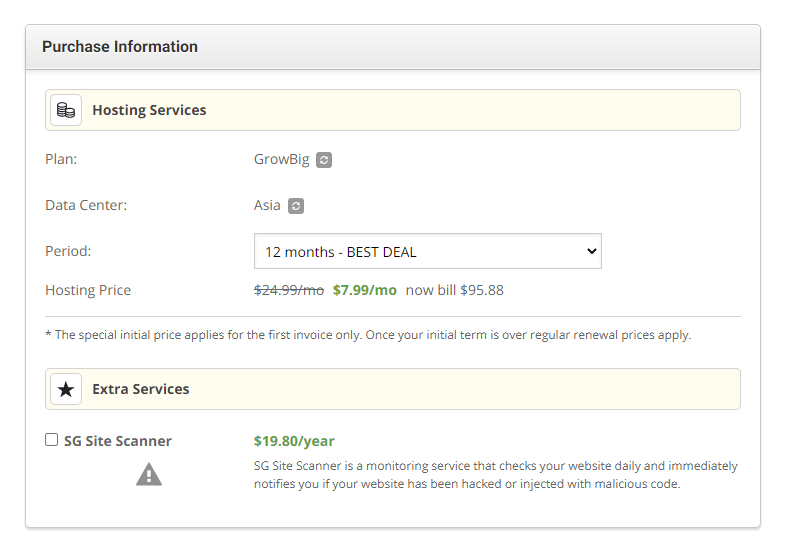
These Extra Services you see at the bottom of the registration page are not necessary.
They are nice to have features.
If you can afford the extra services, I would recommend you check the boxes and buy them extra services.
They will only improve the security of your website.
Here’s what the two extra services you see in the above screenshot mean:
- Domain Privacy – The information you use to register your domain name will be accessible by anyone with a whois search. This feature will make your information private. If you are using a home address, I would highly recommend you use this feature.
- SG Site Scanner – Site Scanner is a monitoring service that checks your website and notifies you if your site has been hacked or your code contains malicious code injected by a hacker.
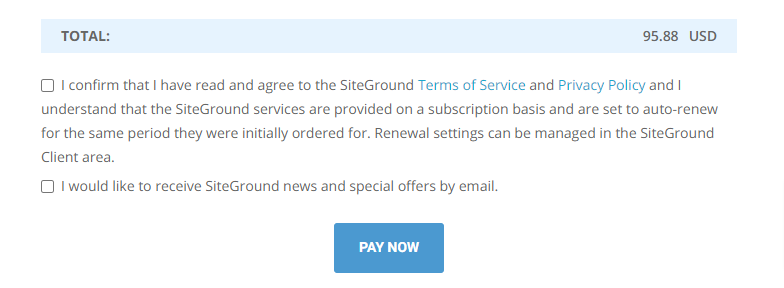
Once you have entered all the required information, check the “I confirm that…” check box and click the Pay Now button:
Step 4: Install WordPress
Now, it’s time to install WordPress.
WordPress, as mentioned earlier, is a Content Management System.
It will help you manage all the content on your blog.
Follow the below steps to install WordPress:
1. Check Your Inbox
Before we can install WordPress, you need to check your inbox for an email from SiteGround.
The email will contain your login details.
Once you have the login details, move on to the next step.
2. Login To The Customer Area
Use the login information you received in the email to log in to the SiteGround customer area.
3. Navigate To My Accounts
Now, click the “My Accounts” tab at the top of the page.
4. Navigate To The cPanel
On the My Accounts page, you will see a section containing information about your new website.
Click the “Go to cPanel” button to visit cPanel.
Note: cPanel is simply a software that allows you to manage your website.
It allows you to manage everything from files to databases.
Once you finish installing WordPress, you will no longer need to use cPanel to manage your website.
You will be able to do that with WordPress.
5. Click The WordPress Icon
Now, click the WordPress icon in the Auto Installers section.
It will take you to the WordPress installation page.
6. Start The Installation
Now, you will see a page with details about WordPress.
Click the Install button to navigate to the installation section.
Now, it’s time to configure your WordPress installation.
Software Setup Section
In the software setup section, fill in the following details:
- Choose Protocol – The protocol you would like to use. Select “http://” for this field.
- Choose Domain – The domain you want to install WordPress to. If your preferred domain is not selected by default, select it from the drop-down menu.
- In Directory – Leave this field blank unless you want to install your blog in a sub-directory. If you want to install WordPress to “http://your-site.com/blog”, fill in “blog” in this field. I recommend leaving it blank unless you know what you are doing.
Site Settings Section
In the Site Settings section, enter a Site Name, and a Site Description and uncheck the Enable Multisite.
Admin Account Section
In the admin account section, you need to fill login information for the Administrator account:
- Admin Username – The username you will use to login into your WordPress blog. By default, this field will contain a randomly generated username. You are free to use that username or choose a new one.
- Admin Password – The password you will use to log into your WordPress blog. You can use the randomly generated password, or choose a new one.
- Admin Email – This is the email where you will receive all the notifications about your WordPress blog.
Now, scroll to the bottom and click the install button.
Wait until the progress bar reaches 100%.
Once the installation completes, you should see a confirmation message.
How To Access Your WordPress Site
If you registered a domain with SiteGround during the registration process, you can use the following URLs to visit your website:
- http://your-site.com – This is the URL to your blog.
- http://your-site.com/wp-admin/ – This URL will take you to the WordPress dashboard. Use the Admin Account login details you created to log in to the Dashboard.
If you registered a new domain with Site Ground in the registration step, move on to the next step.
However, if you are using your own domain name (registered from somewhere else), you will have to configure it to make it work.
It’s not possible for me to cover the configuration process step by step because it’s different for every domain registrar.
To make your domain work, you will need to change its Name Server details to the one provided by SiteGround.
To find your Name Server details, navigate to your site’s cPanel as instructed in the previous section.
You will find your Name Server details on the top left side of the cPanel home:
You will need to change the Name Servers of your domain to the ones assigned to you by SiteGround.
Once you change the Name Servers, you will be able to visit your website at http://your-site.com.
Additional Resources
If you have made it to this section, then it means you have successfully created your first blog.
Here are a few additional resources to help you Kick Start Your Blog:
- 27 Websites With Free Stock Photos For Your Blog
- ThemeForest – Premium Themes For Your WordPress Blog
- WordPress Theme Directory – Free WordPress Themes
Conclusion
I hope this article helped you learn how to start a blog.
If it did, be sure to share it with your friends.
If you got stuck somewhere in the process, feel free to leave a comment.