How To Enable/Disable Google AMP in WordPress

Web Hosting Sumo is supported by our readers. When you purchase via links on our site we may earn a commission. The price you pay isn't affected by this commission. We only promote products that we truly believe in. Learn more.
Google’s Accelerated Mobile Pages (or AMP) aims to speed up the internet for mobile users — especially those on slow connections. It does so by stripping away everything but the essentials from a webpage.
Although I don’t recommend using AMP for most websites, here’s a tutorial to help you enable/disable Google AMP on your WordPress website.
How It Works
To enable Google AMP for your website, you need to create an AMP version of all the pages on your website. The AMP version of your pages is created specifically for Google and follows AMP guidelines.
Thanks to the many AMP plugins available for WordPress, you don’t have to do this manually. Once you install an AMP plugin, WordPress will automatically generate an AMP page for every page on your website.
How To Enable Google AMP
Step 1 – Install an AMP Plugin
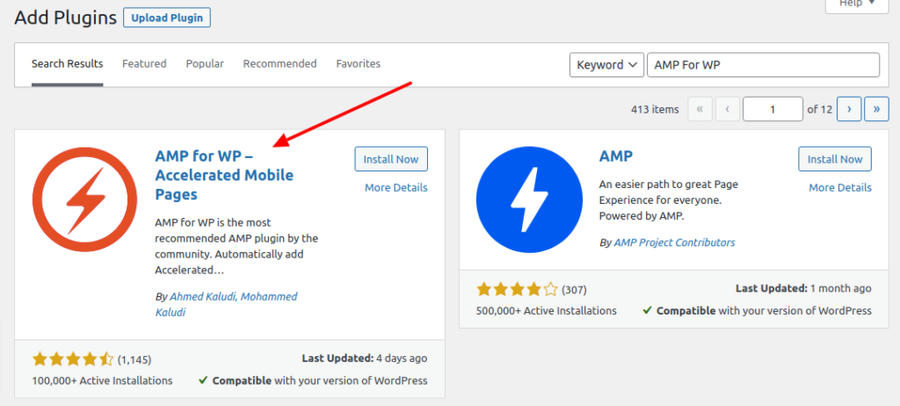
There are lots of AMP plugins available for WordPress and most of them are free, but I recommend going with AMP for WP. It’s a free plugin that is used by over 200,000 websites; it also has hundreds of great reviews and ratings.
On your WordPress dashboard, go to Plugins, then Add New, and search “AMP for WP”:
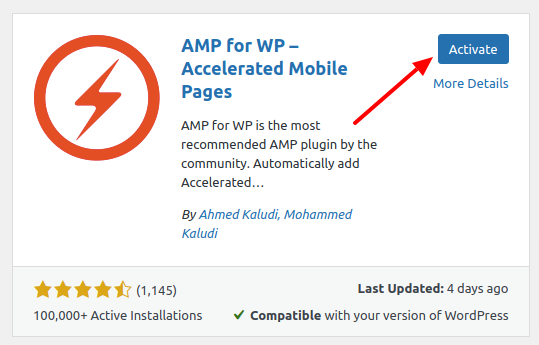
Now click the Install Now button right next to the plugin name to install it. Then click the Activate button once installed:
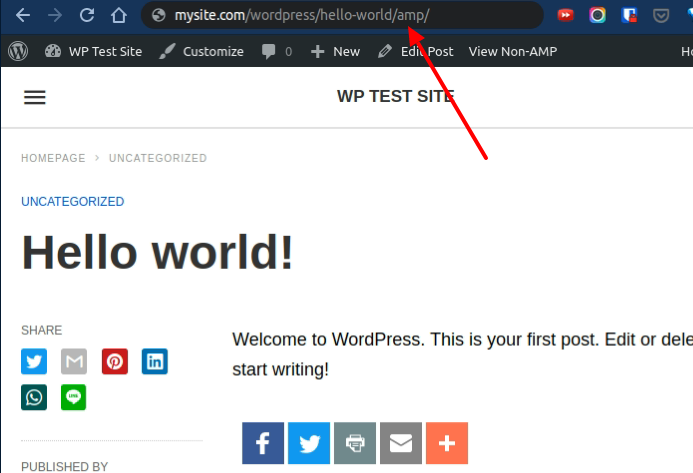
Once you activate the plugin, visit any page on your website and then add /amp to the end of its URL:
Step 2 – Configure The Plugin
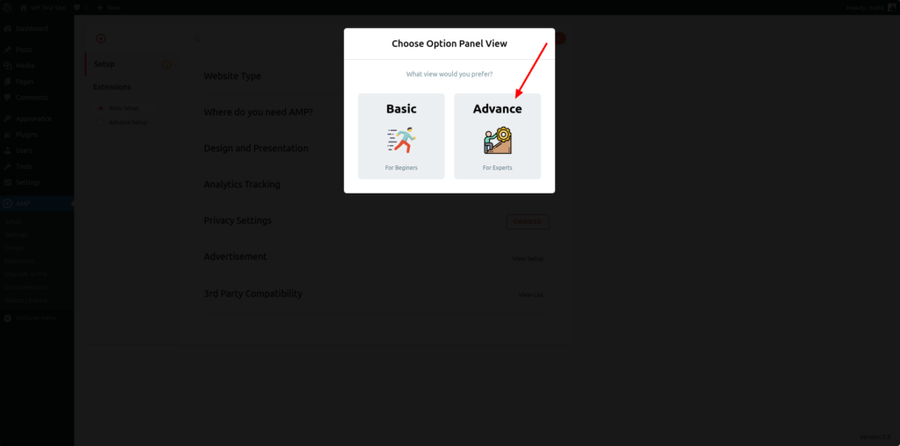
When you activate the plugin, you will be asked to choose between a Basic and Advanced setup:
The AMP for WP plugin has hundreds of settings to help you make it compatible with your website. Before we dive into the advanced settings, let’s first edit the basic settings you will see on the Setup page of the plugin:
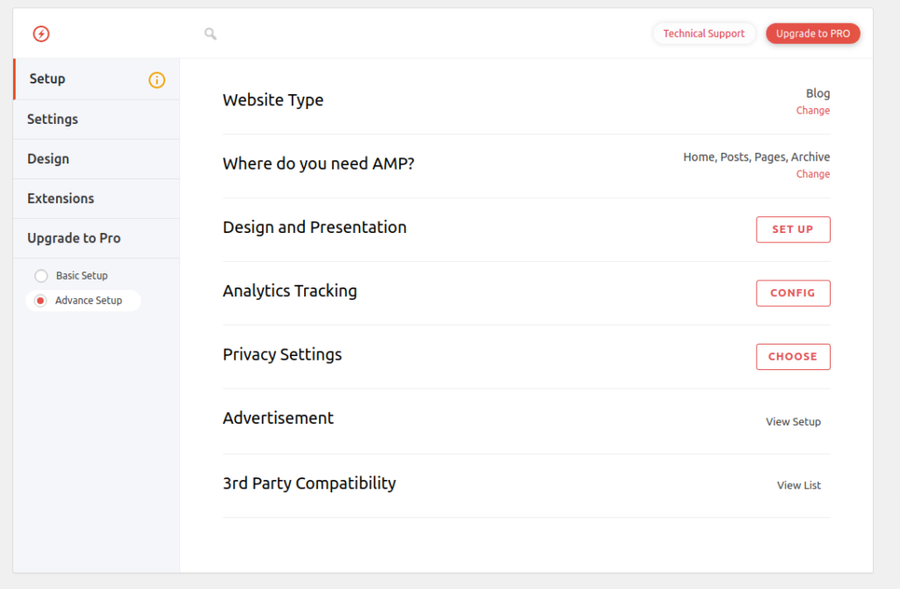
Where do you need AMP?
This setting helps you choose what pages you want to enable AMP on. You will want to enable it for most almost all the pages of your website. If you don’t want AMP everywhere, you could select only Posts and Pages, which is where most of your search visitors will go.
Design and Presentation
This setting allows you to put a logo on your AMP pages. It also allows you to add select a global color scheme for your website.
Analytics Tracking
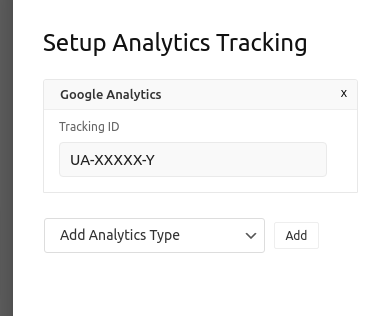
This setting allows you to add your Google Analytics code to every AMP page. You can also choose other analytics software from the dropdown list.
Privacy Setting
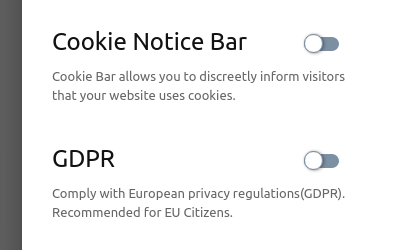
If you want to add a cookie consent bar or a GDPR notice bar to your website, this is where you can enable it. I recommend adding at least the Cookie consent bar.
These are all the basic settings you need to configure. Now, let’s move on to the advanced settings.
Step 3 (Optional) – Advanced Settings
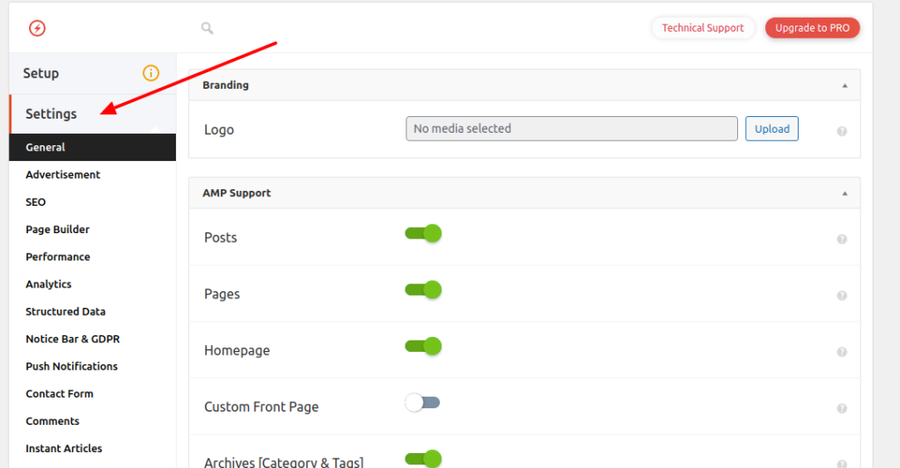
Although there’s no need to edit the advanced settings, I recommend having a look at all the settings on your own and seeing if you need to enable or disable something to make the plugin compatible with your website.
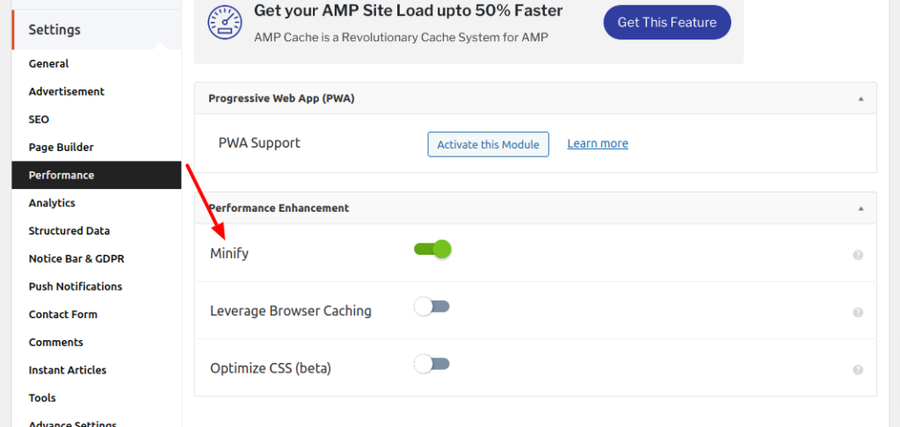
For example, if you already have a caching plugin such as Hummingbird, W3 Total Cache, or WP Super Cache, you will want to disable minification to avoid conflict with your site’s caching plugin:
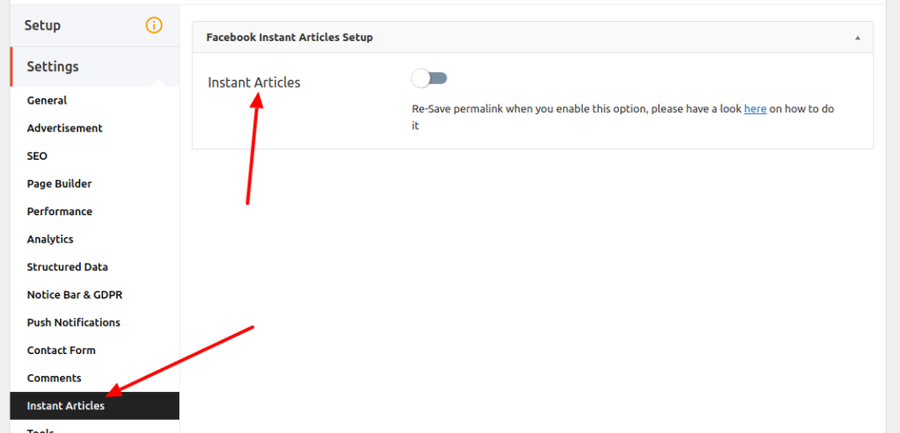
You can also enable Facebook Instant Articles from the advanced settings:
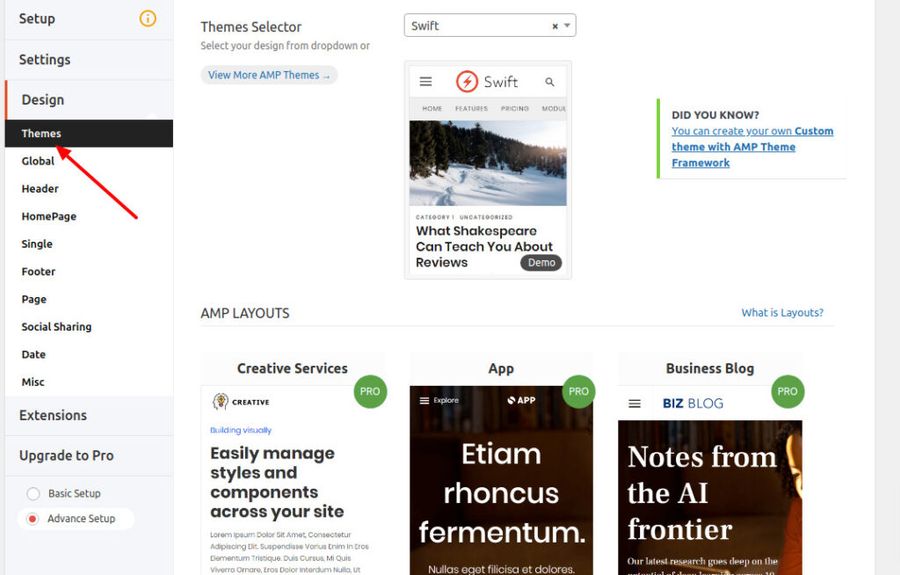
Although the basic design that is included with this plugin is all you need, you might want to check out the other premium templates available:
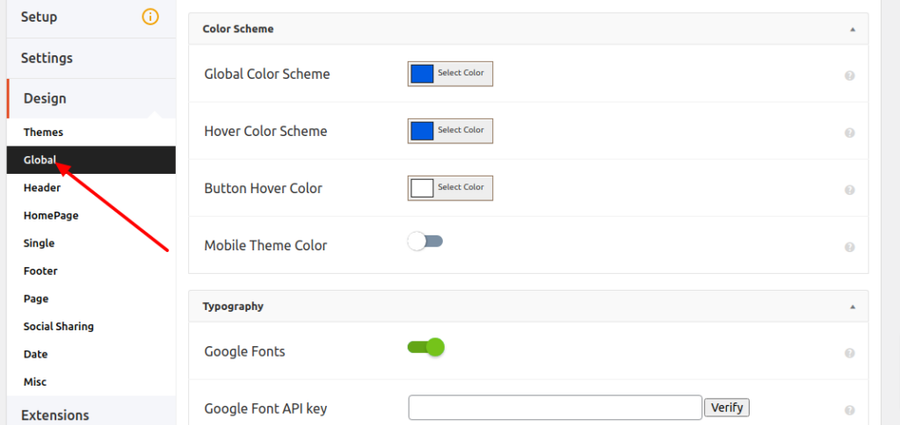
If you don’t like the color scheme of your website’s AMP pages, you can edit the styles from the Global design settings page under the Design page:
How To Correctly Disable AMP In WordPress
If you disable AMP pages on your website right away, you will lose rankings in Google. If your AMP pages haven’t been indexed by Google, then you can disable AMP right away.
To check if your AMP pages have been indexed, search a couple of your website’s pages that have AMP enabled on Google. If you don’t land on any AMP pages after searching 3 or 4 pages in Google, then it’s safe to assume that your pages aren’t indexed.
But if they have been indexed, then you need to follow these steps to disable AMP:
Step 1 – Get your pages removed from the Google index
The goal of this step is to ask Google to remove our AMP pages from their index and to discourage Google from indexing any of the new (or unindexed) AMP pages.
To do this, you need to add this meta tag to the head section of your AMP pages:
<meta name=”robots” content=”noindex,nofollow”/>This code discourages Google from indexing the page it is on.
Go to the SEO section on the Settings page of the AMP plugin and paste the above code in the Head section:
_Z2jhy9S.png)
Now, click Save Changes.
Step 2 – Setup Redirects
Before you can disable the plugin, you will have to wait a couple of weeks for Google to deindex your website’s AMP pages. I recommend waiting at least 2 weeks.
Once your AMP pages are deindexed, you will have to redirect all the AMP pages to their original pages. To do this, you will need a plugin that can create redirections for your existing pages.
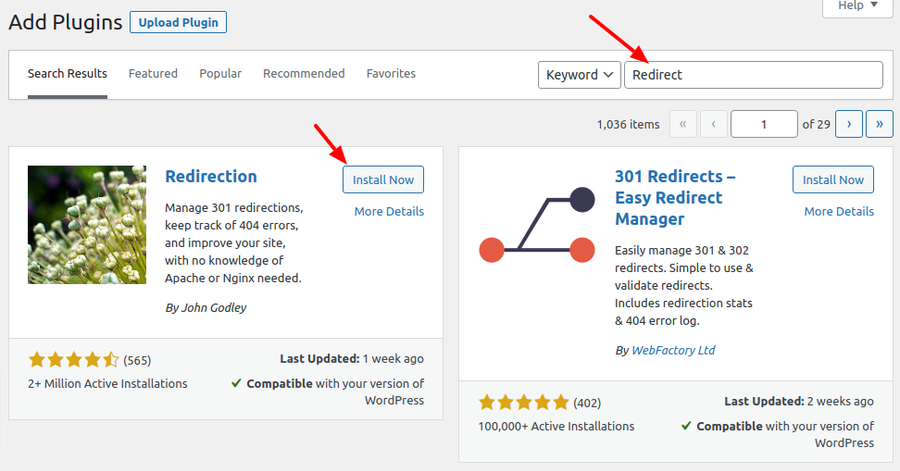
I recommend the free Redirection plugin. You can install it by going to Add New sub-menu in the Plugins menu and searching redirect:
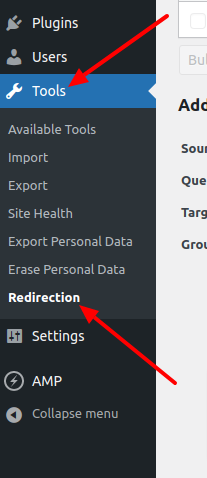
Once you activate the plugin, go to Tools, then Redirection:
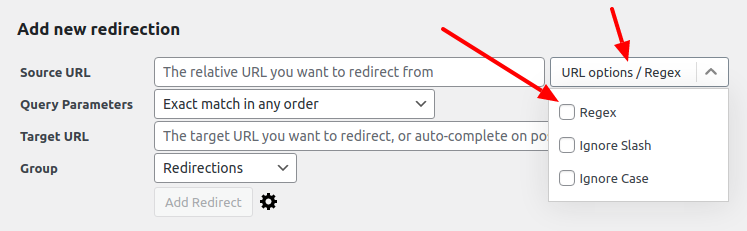
Follow the quick and easy setup window. Then scroll down to the Add New Redirection form and select Regex from the drop-down menu:
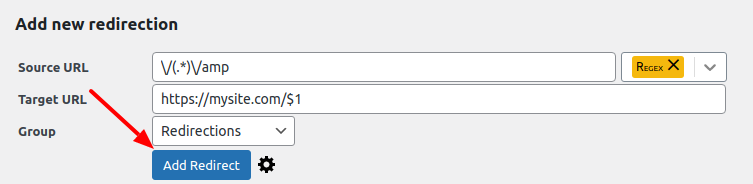
Now, put the following expression in the Source URL field:
\/(.*)\/ampThis expression instructs the plugin to select any pages that end in “/amp”.
Now put the following expression in the Target URL field:
https://mysite.com/$1
Change mysite.com to your site’s domain name. The above expression instructs the plugin to redirect AMP pages to their original page.
Once you fill in all the details, click the Add Redirect button:
Step 3 – Remove The AMP Plugin After 2 Weeks
Once your pages have been deindexed by Google, you can remove the AMP plugin from your website. You can also remove the Redirect plugin at this point but I recommend waiting another 2-3 months before you remove the Redirection plugin.
Conclusion
Although I prefer not to use AMP on any of my websites, you might want to try it on yours if you think it will get you more traffic.
I recommend experimenting with it rather than going all in at once. This tutorial will help you with both installing and removing AMP from your website.